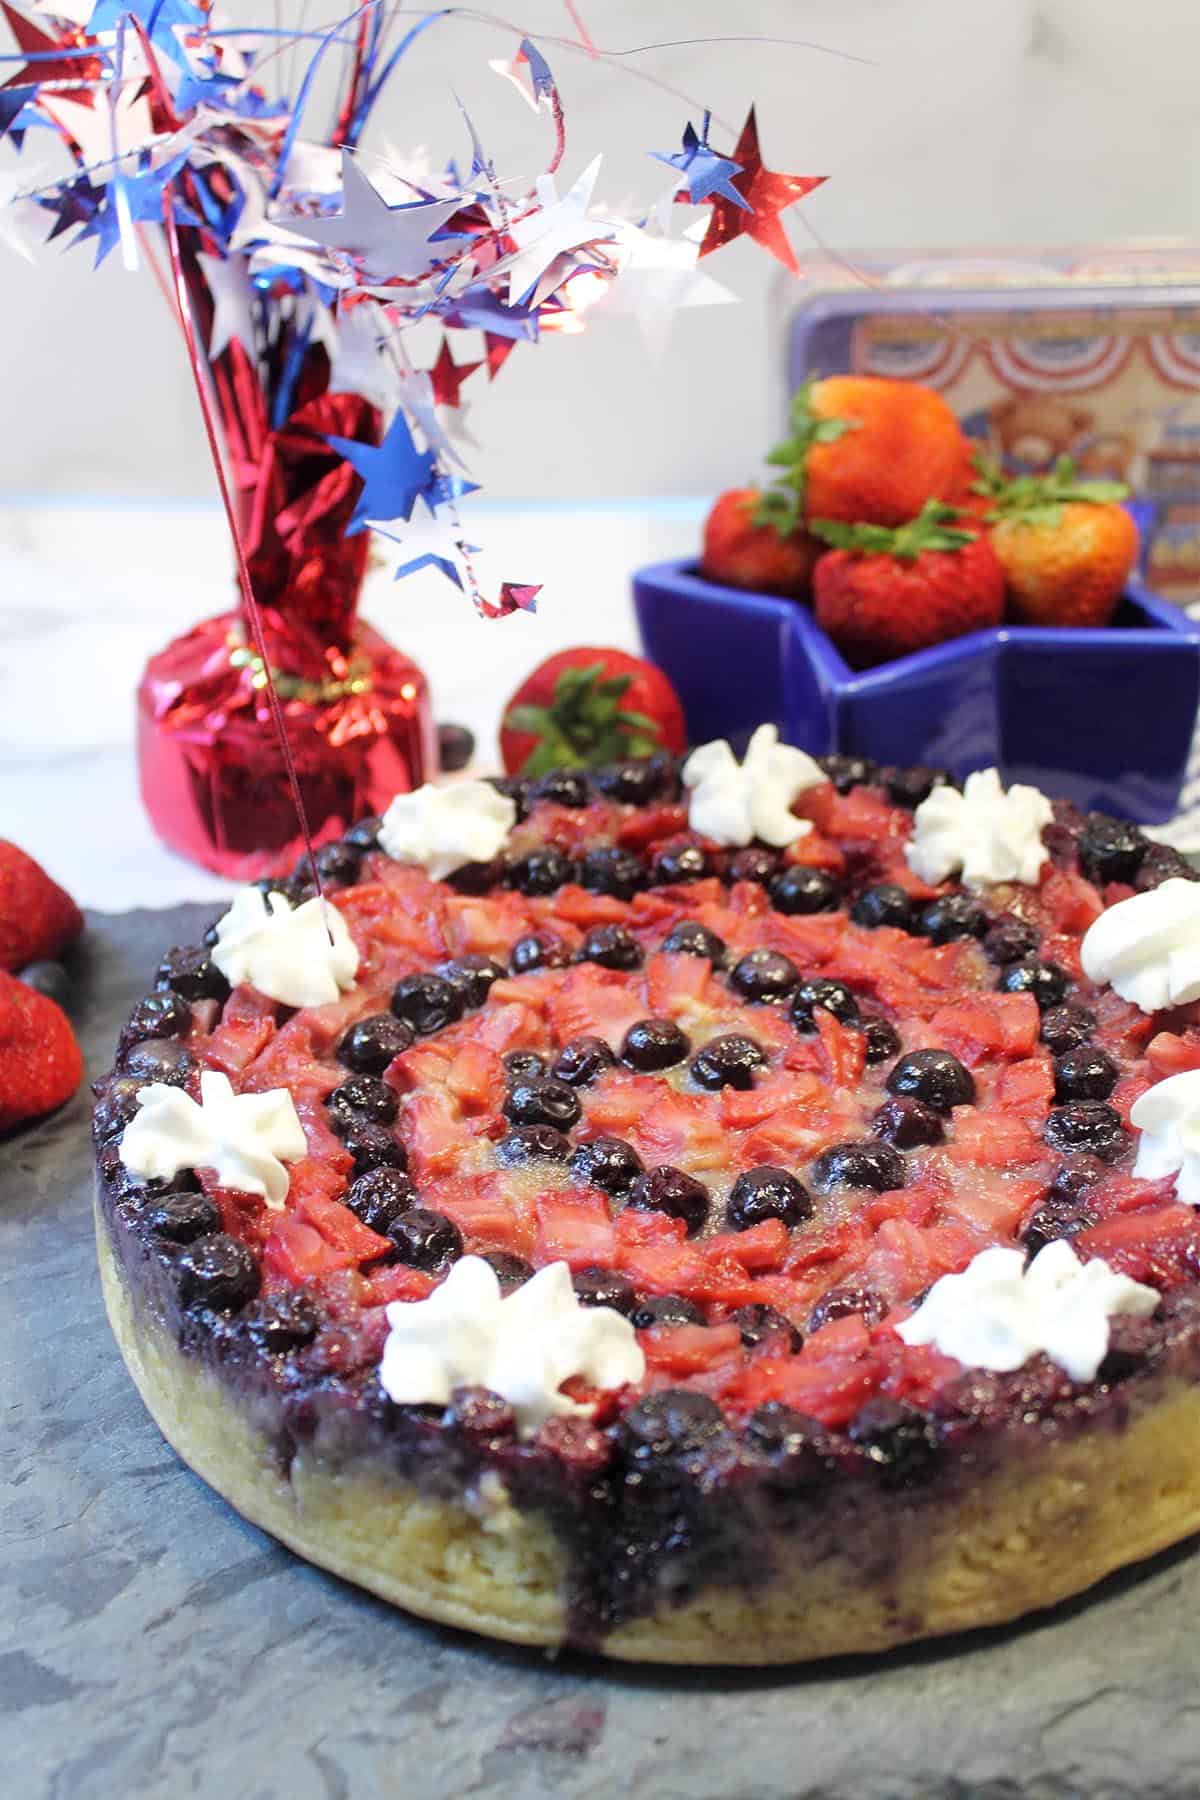
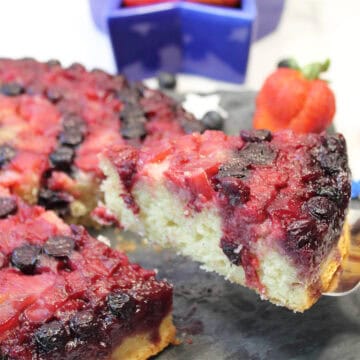
This Berry Upside Down Cake is a fun twist of the an old-fashioned upside down cake. It starts with a tender, moist vanilla flavored cake that's topped with sweetened fresh plump blueberries and juicy strawberries. Simple to make and fun to decorate however you want, it's perfect for celebrating all the red white and blue holidays, like 4th of July and Memorial Day, or as a light dessert for warm summer barbecues or everyday picnics.
Why this is the upside down cake recipe to make
This mixed berry upside down cake is the kind of dessert that feels nostalgic and homemade, but with a fresh, summery vibe. Here are just a few reasons why this is the best upside down cake recipe:
Made from scratch with pantry-friendly ingredients, this cake is easy enough for a beginner and satisfying enough for a pro baker.
Perfect for patriotic holidays. Use blueberries and strawberries to create a red, white (hello whipped cream!), and blue dessert everyone will love.
Make pretty patterns with your berries! Whether you go for a swirl, stripes, or pie-slice wedges, this cake is your canvas.
No frosting required because the fruit topping is all the flair you need.
It's moist and flavorful thanks to vanilla yogurt or sour cream and a splash of vanilla creamer.
Ingredients and what they bring to the cake
Before you flip into baking mode, let's take a look at what you'll need. This cake keeps it simple, with a from-scratch batter and a deliciously easy berry topping.
For the berry topping:
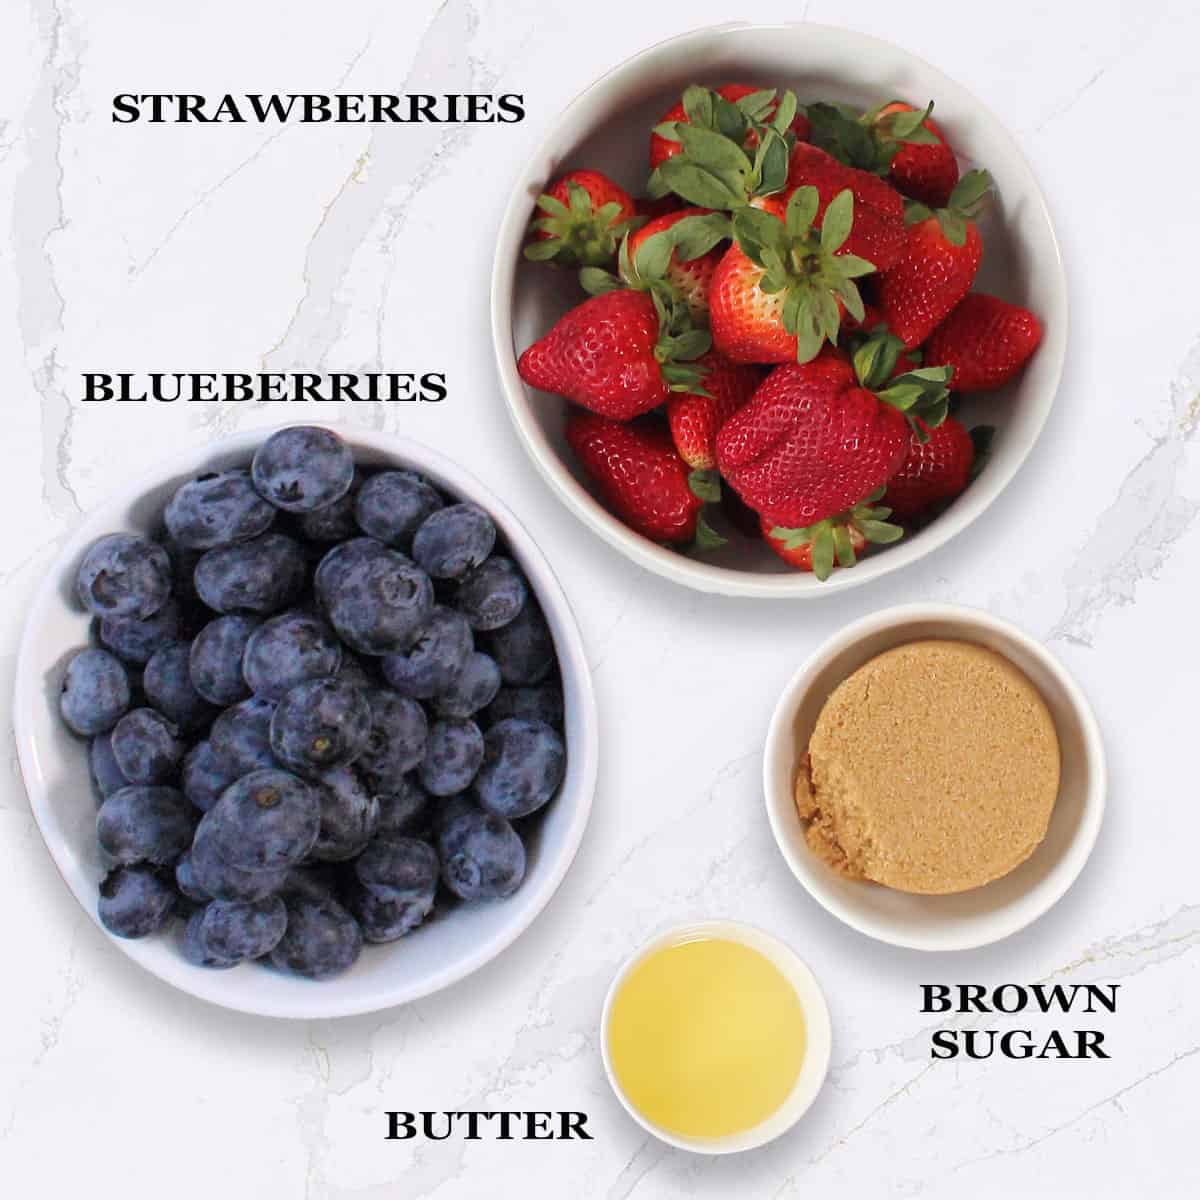
- Melted butter - soaks into the sugar and berries, giving that glossy, caramelized finish.
- Light brown sugar - adds sweetness and helps create that classic upside down stickiness.
- Blueberries and strawberries - for bright, patriotic color and juicy bursts of berry flavor.
For the cake:
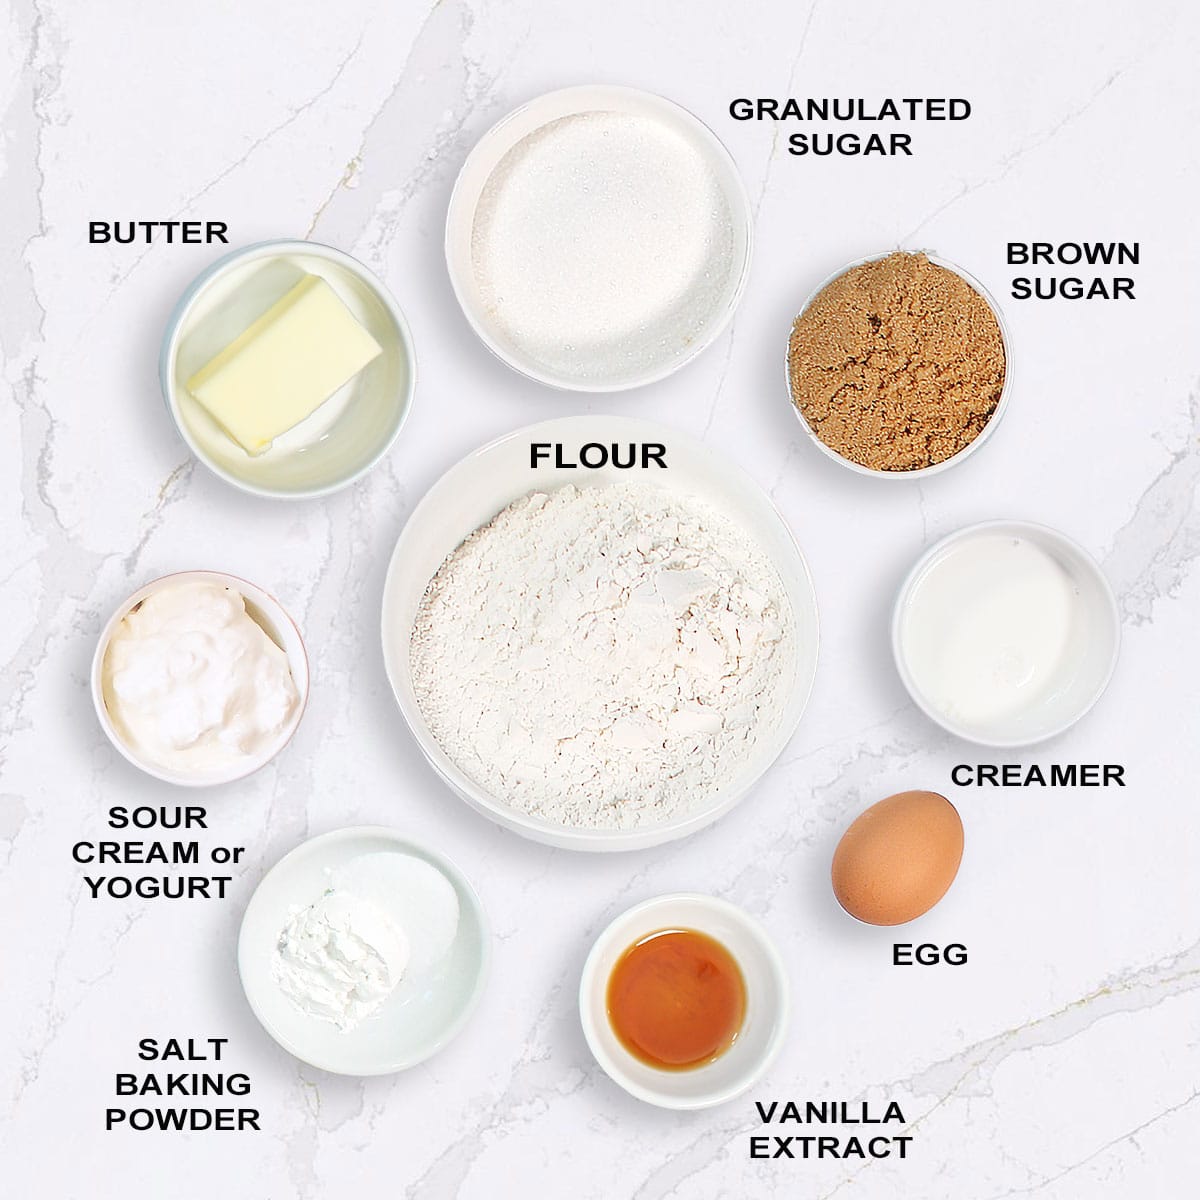
- Unsalted butter - adds richness and flavor to the cake batter.
- Granulated sugar and light brown sugar - the combo gives sweetness and depth.
- Egg - helps bind the batter and adds structure.
- Vanilla extract - always a good idea.
- Vanilla yogurt or sour cream - adds moisture and a hint of tang.
- Vanilla coffee creamer - a fun twist that adds extra flavor and richness.
- Flour, baking powder, salt - the dry ingredient trio that brings the cake together.
For garnishing:
- Whipped cream - dollop it on top to add that "white" in your red, white, and blue!
- More berries and mint leaves - for that fresh, summery finishing touch.
How to make berry upside down cake
Making this cake is a breeze and flipping it upside down at the end is so cool! Here's how it all comes together:
Cake Batter
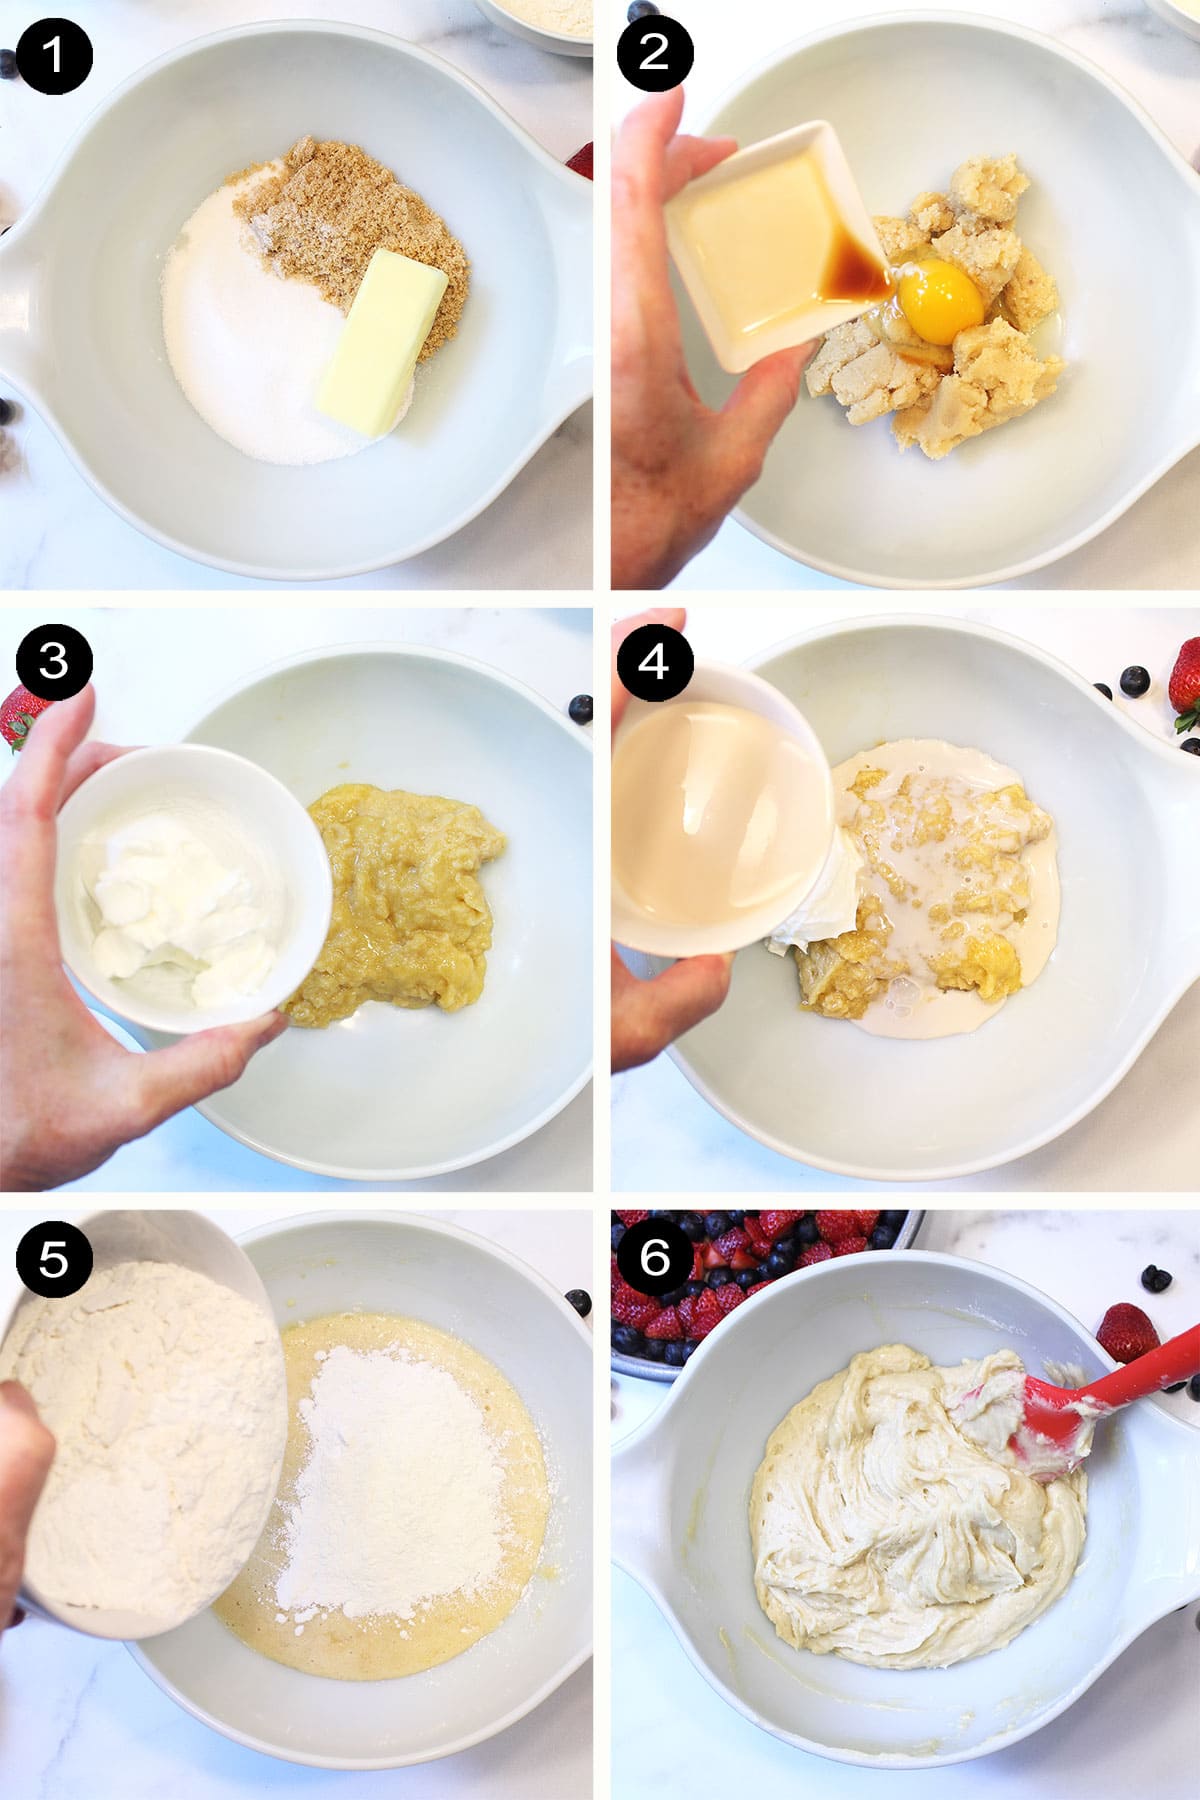
- In a mixing bowl, add butter and both sugars and beat for about 2 minutes.
- Add egg and vanilla extract and mix well.
- Continue beating as you add yogurt/sour cream.
- Add vanilla creamer and beat well.
- Combine flour, baking powder, and salt in a small bowl and add to liquid ingredients.
- Fold together until just blended so as not to toughen cake.
Fruit Topping
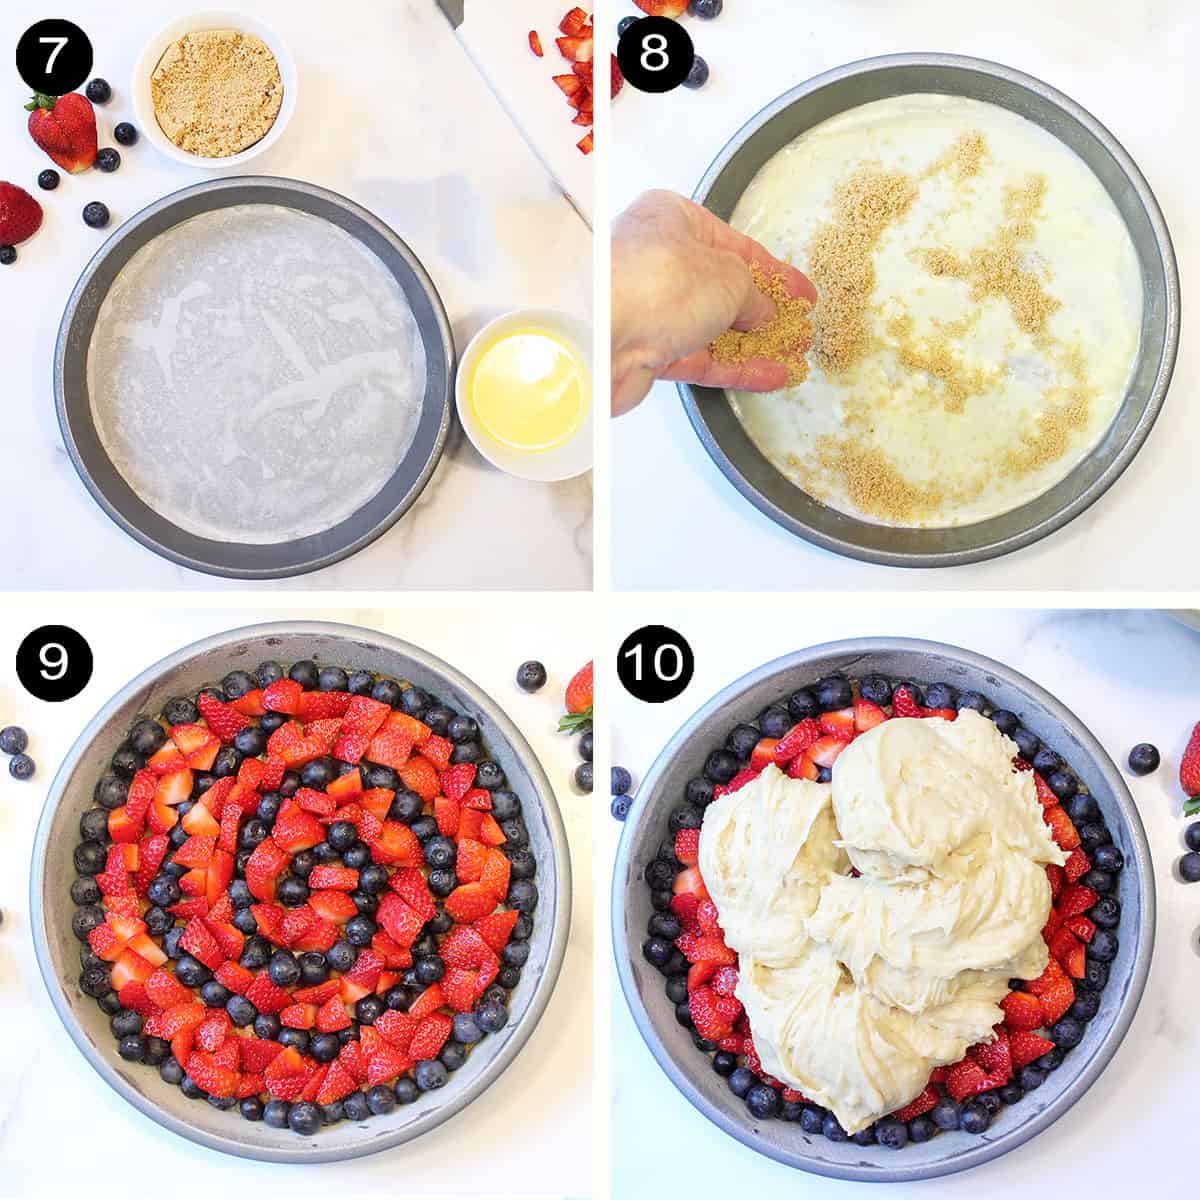
- Melt butter and pour it into the bottom of the cake pan.
- Sprinkle light brown sugar over butter evenly.
- Place berries in your preferred design. I did a spiral with the blueberries and filled it in with the diced strawberries. You could also do it in rows or pie slices and make a nice red and blue pattern.
- Spoon batter carefully over the fruit.
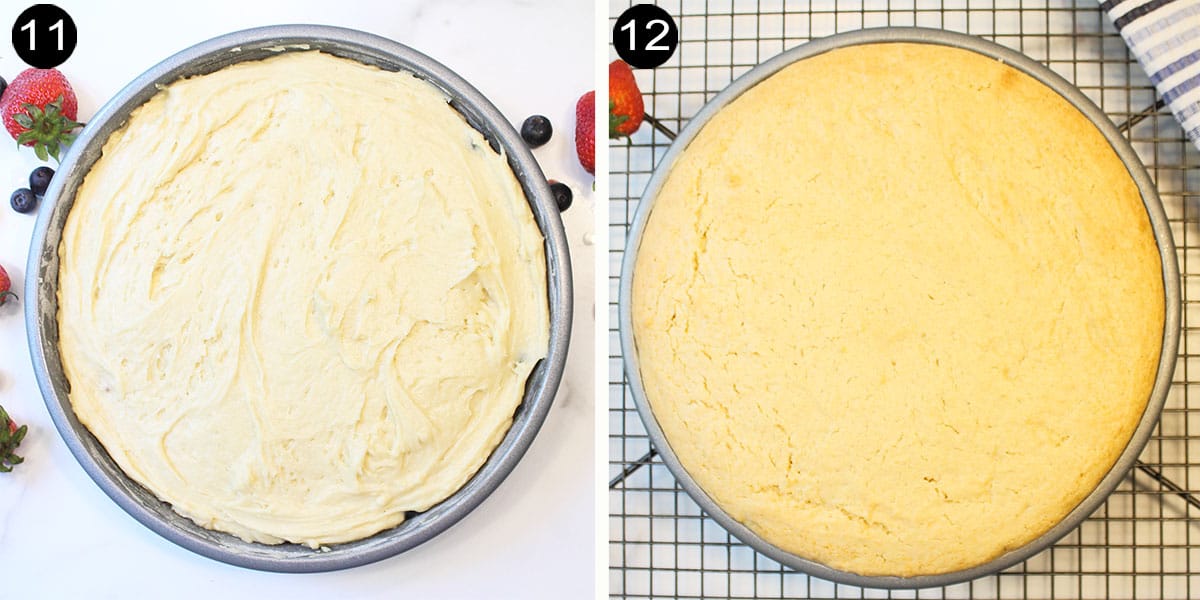
- Smooth batter to edges trying not to dislodge the fruit.
- Bake for 50 minutes. Insert a toothpick in the center to check for doneness. If it comes out mostly clean with just a few crumbs it is done. Let cool for 10 minutes on a wire rack.
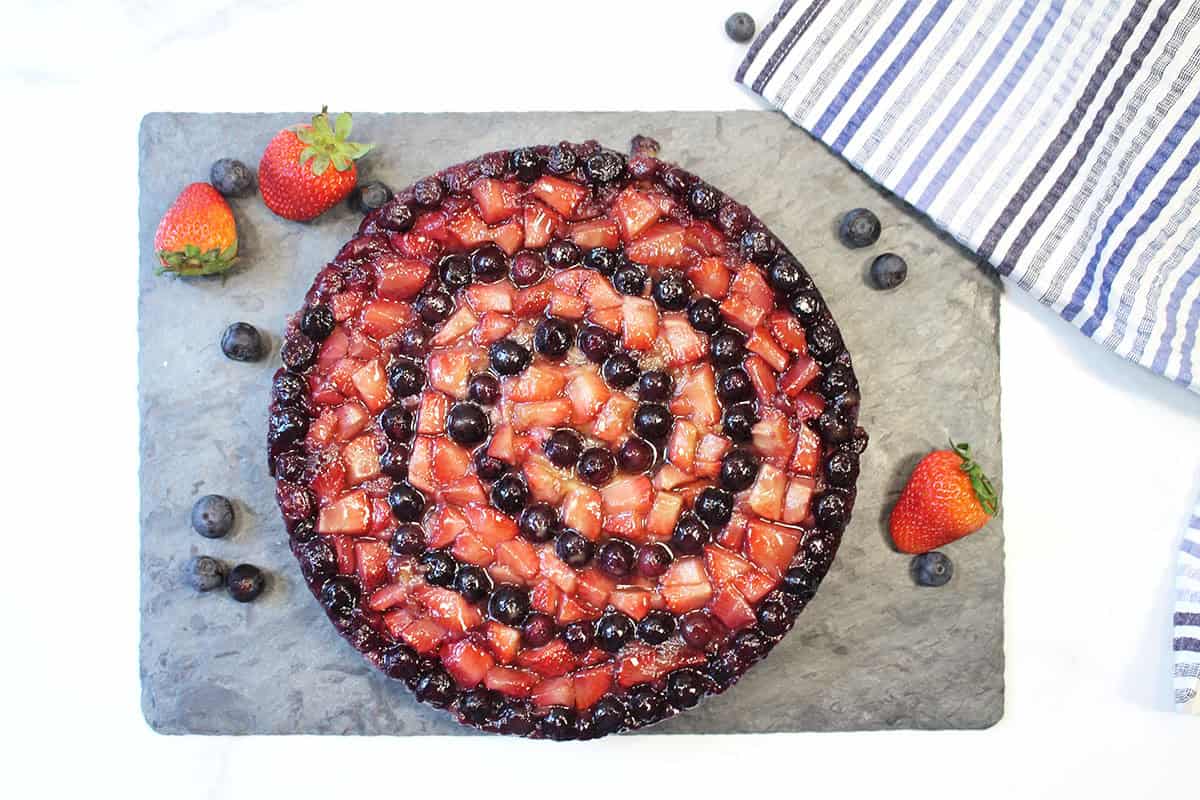
To finish, place a platter on top of the cake pan. Carefully, using pot holders, grab both platter and cake pan and turn over. Lift pan off and let cool for at least 30 minutes. If any fruit sticks to the pan, just take it off and place it back on the cake.

Recipe tips for success
- For the tenderest crumb, use full-fat yogurt or sour cream and full-fat creamer, trust me, it makes a difference.
- Want a boost of flavor? Try vanilla yogurt with a dash of cinnamon in the batter.
- Line the pan with parchment paper! It helps the cake release easily and keeps your berry pattern intact.
- Let it rest for 1-2 hours at room temperature before serving. That's when the texture and flavor are at their peak.
- If your berries are especially juicy, pat them dry with a paper towel before adding them to the pan to help prevent a soggy top.
Recipe variations to make it your own
There are so many ways to put a spin on this fruity homemade upside down cake, so get creative!
Fruits to try: Apples, apricots, bananas, cherries, citrus slices, or even coconut for a tropical twist.
Add a boozy touch: Stir in 2 tablespoons of liquor to the batter for a grown-up twist. Try vodka, rum, tequila, Grand Marnier, Chambord, or berry liqueur for flavor that plays well with the fruit.
Want to save this recipe?
How to store and freeze
While this cake is best enjoyed fresh, you can store leftovers. Just make sure the cake is fully cooled, then wrap it tightly in plastic wrap and refrigerate it for up to 3 days.
To freeze, wrap individual slices or the whole cake in plastic wrap, then add a layer of aluminum foil. Freeze for up to 3 months. When you're ready to serve, let it thaw overnight in the refrigerator.
More fruity dessert recipes
Patriotic Parfait - This red, white, and blue delight is filled with layers of fresh blueberries, sweet strawberries, angel food cake, and whipped cream.
Strawberry Margarita Crisp - Sweet, fresh strawberries topped with a crispy macaroon crumb topping and sliced almonds make this the perfect summer dessert.
Blueberry Galette - An easier than pie dessert with fresh juicy blueberries, sweetened with sugar & sprinkled with lemon juice then baked into a golden flaky pie crust.
Pineapple Rum Upside Down Cake - a moist sweet cake infused with rum and bursting with the flavors of fresh pineapple, sweet cherries and caramelized brown sugar.
Bananas Foster Upside Down Cake - a combination of the traditional upside down cake with bananas instead of pineapple and a touch of rum. Paired with delicious caramelized bananas and pecans - it's a winner!
Find lots more fruit dessert recipes here on 2CM!
Ingredients
Topping
- 2 Tablespoons butter melted
- ⅓ cup light brown sugar
- 1 cup blueberries
- 1 cup strawberries diced
Cake
- ⅓ cup unsalted butter
- ½ cup sugar
- ¼ cup light brown sugar
- 1 large egg
- 1 teaspoon vanilla extract
- ⅓ cup vanilla yogurt or sour cream (I used a vanilla cinnamon yogurt which was excellent)
- ⅓ cup vanilla coffee creamer
- 1 ½ cups flour
- 1 ½ teaspoons baking powder
- ½ teaspoon salt
Instructions
- Preheat oven to 350 degrees. Grease a 10" round cake pan with butter or nonstick spray. Cut parchment paper to fit bottom and place in pan.
Topping
- Melt butter and pour into bottom of cake pan.
- Sprinkle light brown sugar over butter evenly.
- Place berries in your preferred design. I did a spiral with the blueberries and filled it in with the diced strawberries. You could also do it in rows or pie slices and make a nice red and blue pattern. Set aside.
Cake Batter
- In a mixing bowl, cream butter and both sugars for about 2 minutes.
- Add egg and extract and mix well.
- Continue beating as you add yogurt/sour cream and creamer.
- Combine flour, baking powder and salt in small bowl. Add to batter and mix just until blended.
- Spoon batter gently over fruit so as not to dislodge them. You want to keep that nice pattern. Smooth carefully.
- Bake for 50 minutes. Check at the 35 or 40 minute mark to see if the cake is getting too brown. If it is, cover with aluminum foil for remainder of baking time.
- Note: Don't worry if it sticks to the cake a little as the top will become the bottom when it is done.
- Test to make sure the cake is done by inserting a toothpick in center. If it comes out mostly clean with just a few crumbs the cake is done.
- Remove from oven and place on wire rack to cool for 10-15 minutes.
- Place serving plate on top of pan and, holding sides of cake pan and dish, flip over so fruit is on top.
- Gently lift off cake pan and allow to cool.
- Prior to serving decorate with whipped cream. You can also add some additional berries and sprig of mint if desired.
- Note: This cake is best served 1-2 hours after baking and before refrigerating.
Notes
Want to save this recipe?
Nutrition
Frequently Asked Questions
What is upside down cake?
It's a cake that's baked with fruit on the bottom and cake batter on top. Once it's done, you flip it out of the pan so the fruit ends up beautifully displayed on top - hence the name!
How do you flip an upside down cake?
Let the cake cool for about 10 to 15 minutes first. Then run a knife around the edges to loosen anything that may be stuck. Place your serving plate over the pan, hold both tightly with potholders, and flip it over quickly but carefully. Lift off the pan and enjoy that big reveal!
How do you keep the cake from getting soggy?
Make sure to pat your fruit dry before layering it in the pan. Also, be sure to bake the cake all the way through, about 50 minutes, or until a toothpick in the center comes out clean. This cake is best served shortly after baking, as storing it in the fridge can make it soggier over time.
Do I need to refrigerate this cake?
Yes, after it's been out for more than a couple of hours. It's best enjoyed shortly after baking, but if you need to store it, pop it in the fridge. Just know it may get a little soggy the longer it sits.
This post has been updated and was first published on June 21, 2020.