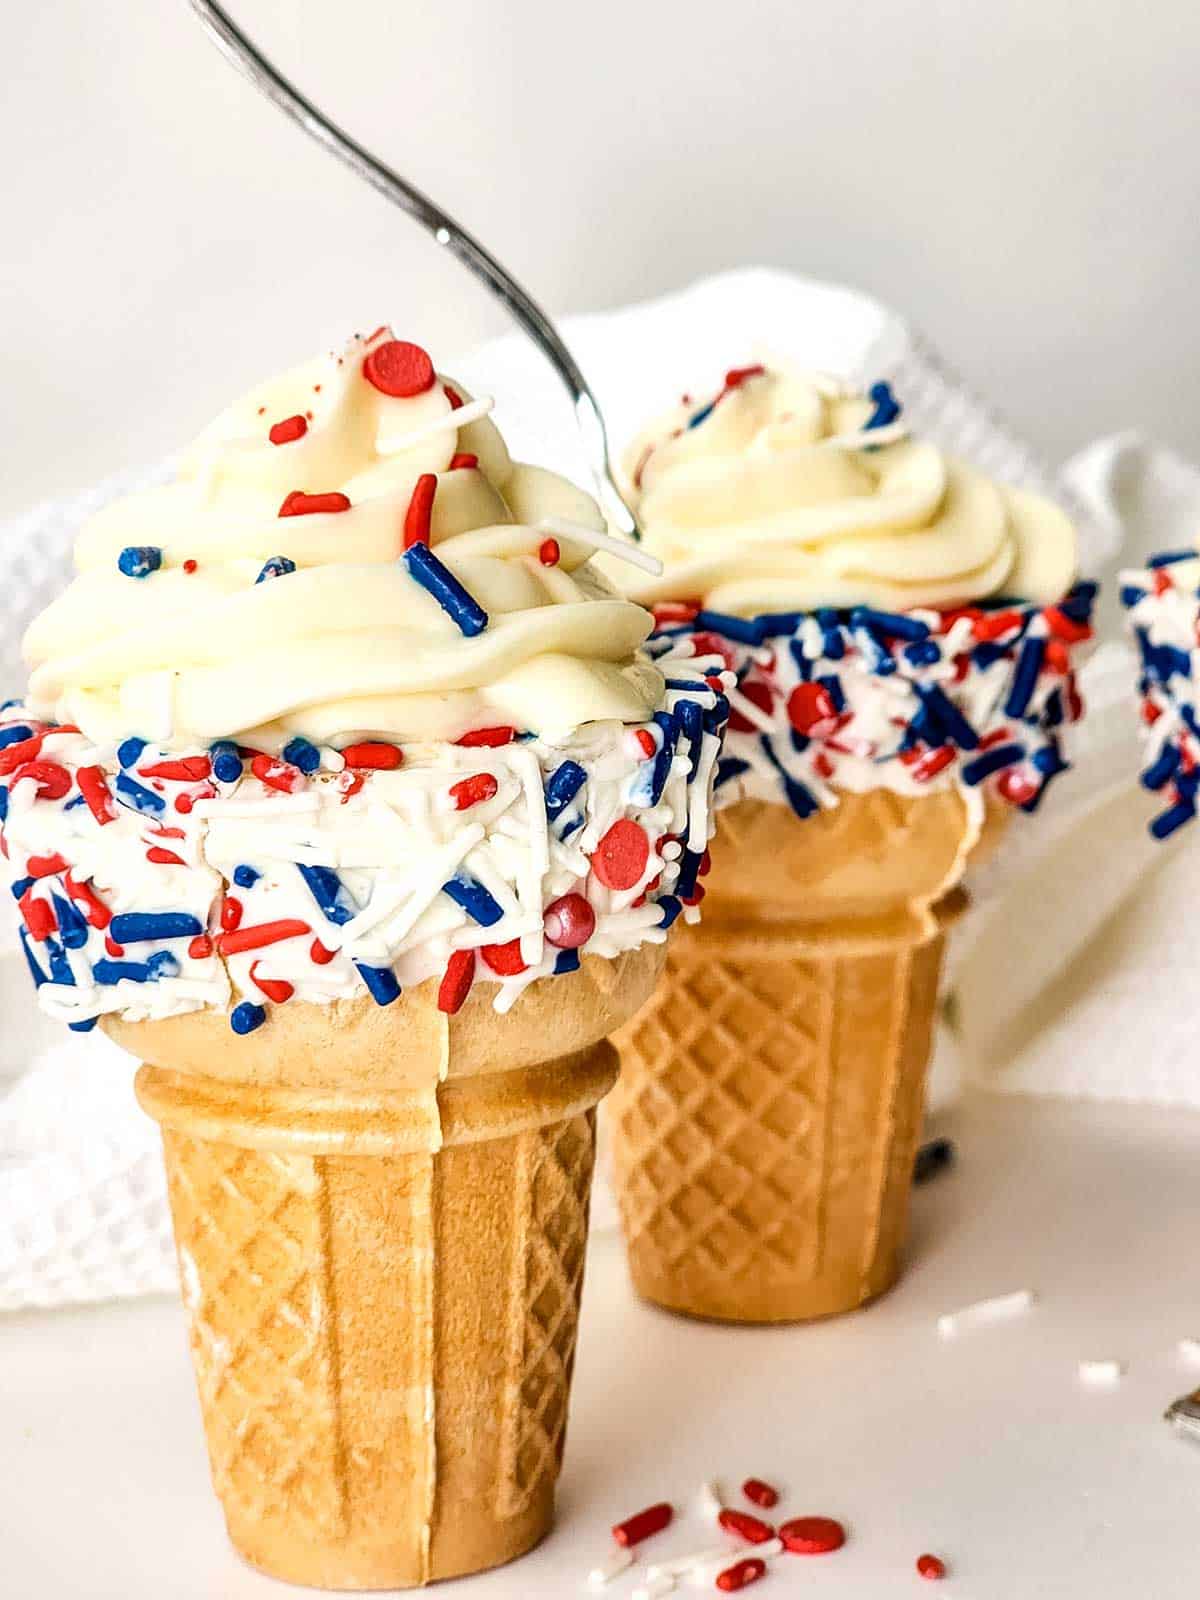
Dive into these indulgent and delicious cheesecake mousse cones, where the cones are dipped in white chocolate then filled with rich and creamy cheesecake mousse. The sinfully delicious no-bake cheesecake mousse is a fuss-free way to make a truly drool-worthy cheesecake dessert.
Great mini dessert for birthday parties, backyard barbecues, and holidays like July 4th, Valentine's Day, or Christmas.
FYI - This post contains affiliate links. As an Amazon Associate, I earn from qualifying purchases. All links are products I use when making my recipes.
Table of Contents
Fun and Festive Desserts and Treats
There's nothing like making a fun and festive dessert for special occasions and holidays. From specialty shapes to sprinkles to seasonal colors, there is something sweet and exciting to help the season shine. The possibilities are endless and certainly add a sparkle to any celebration.
With July 4th around the corner think Patriotic Parfaits and Berry Upside Down Cake, for Easter, think of these candy-filled Easter Rice Krispie Treats and don't forget Halloween with some fun-shaped S'mores Cookies. Of course, it doesn't have to be a holiday to enjoy a sweet treat. Take these easy-to-make Chocolate Chip Cheesecake Cookies decorated with sprinkles for a fun summer surprise.

Why You'll Love This Cheesecake Cones Recipe
Easy to make starting with store-bought ice cream cones
No-bake dessert - just whip and fill makes them perfect for summer
No eggs anywhere in sight
Adaptable to any occasion, just change to different colored and shaped sprinkles
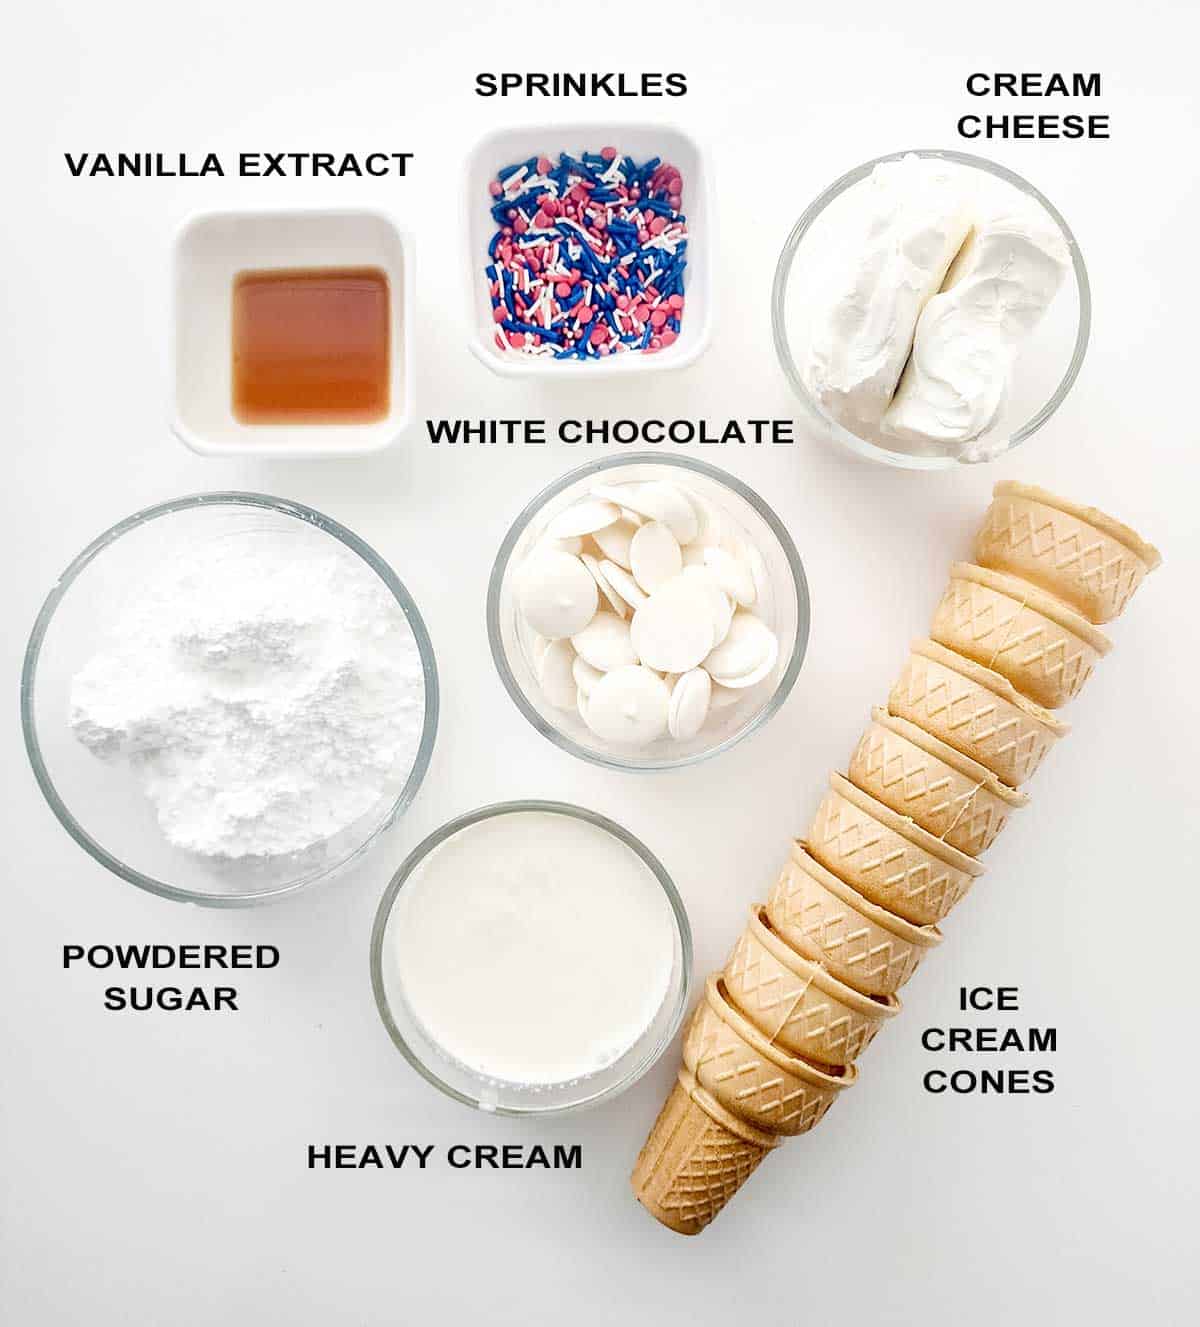
Ingredients
For the vanilla cheesecake mousse:
- Cream cheese
- Heavy whipping cream
- Powdered sugar
- Vanilla extract
For the white chocolate dipped ice cream cones:
- Ice cream cones, either sugar or waffle cones
- White chocolate melting chips
- Sprinkles
How to Make Cheesecake Cones
There are three parts to this recipe - making cheesecake mousse, dipping ice cream cones in chocolate and sprinkles, and assembling the dessert.
Want to save this recipe?
How to Make Cheesecake Mousse
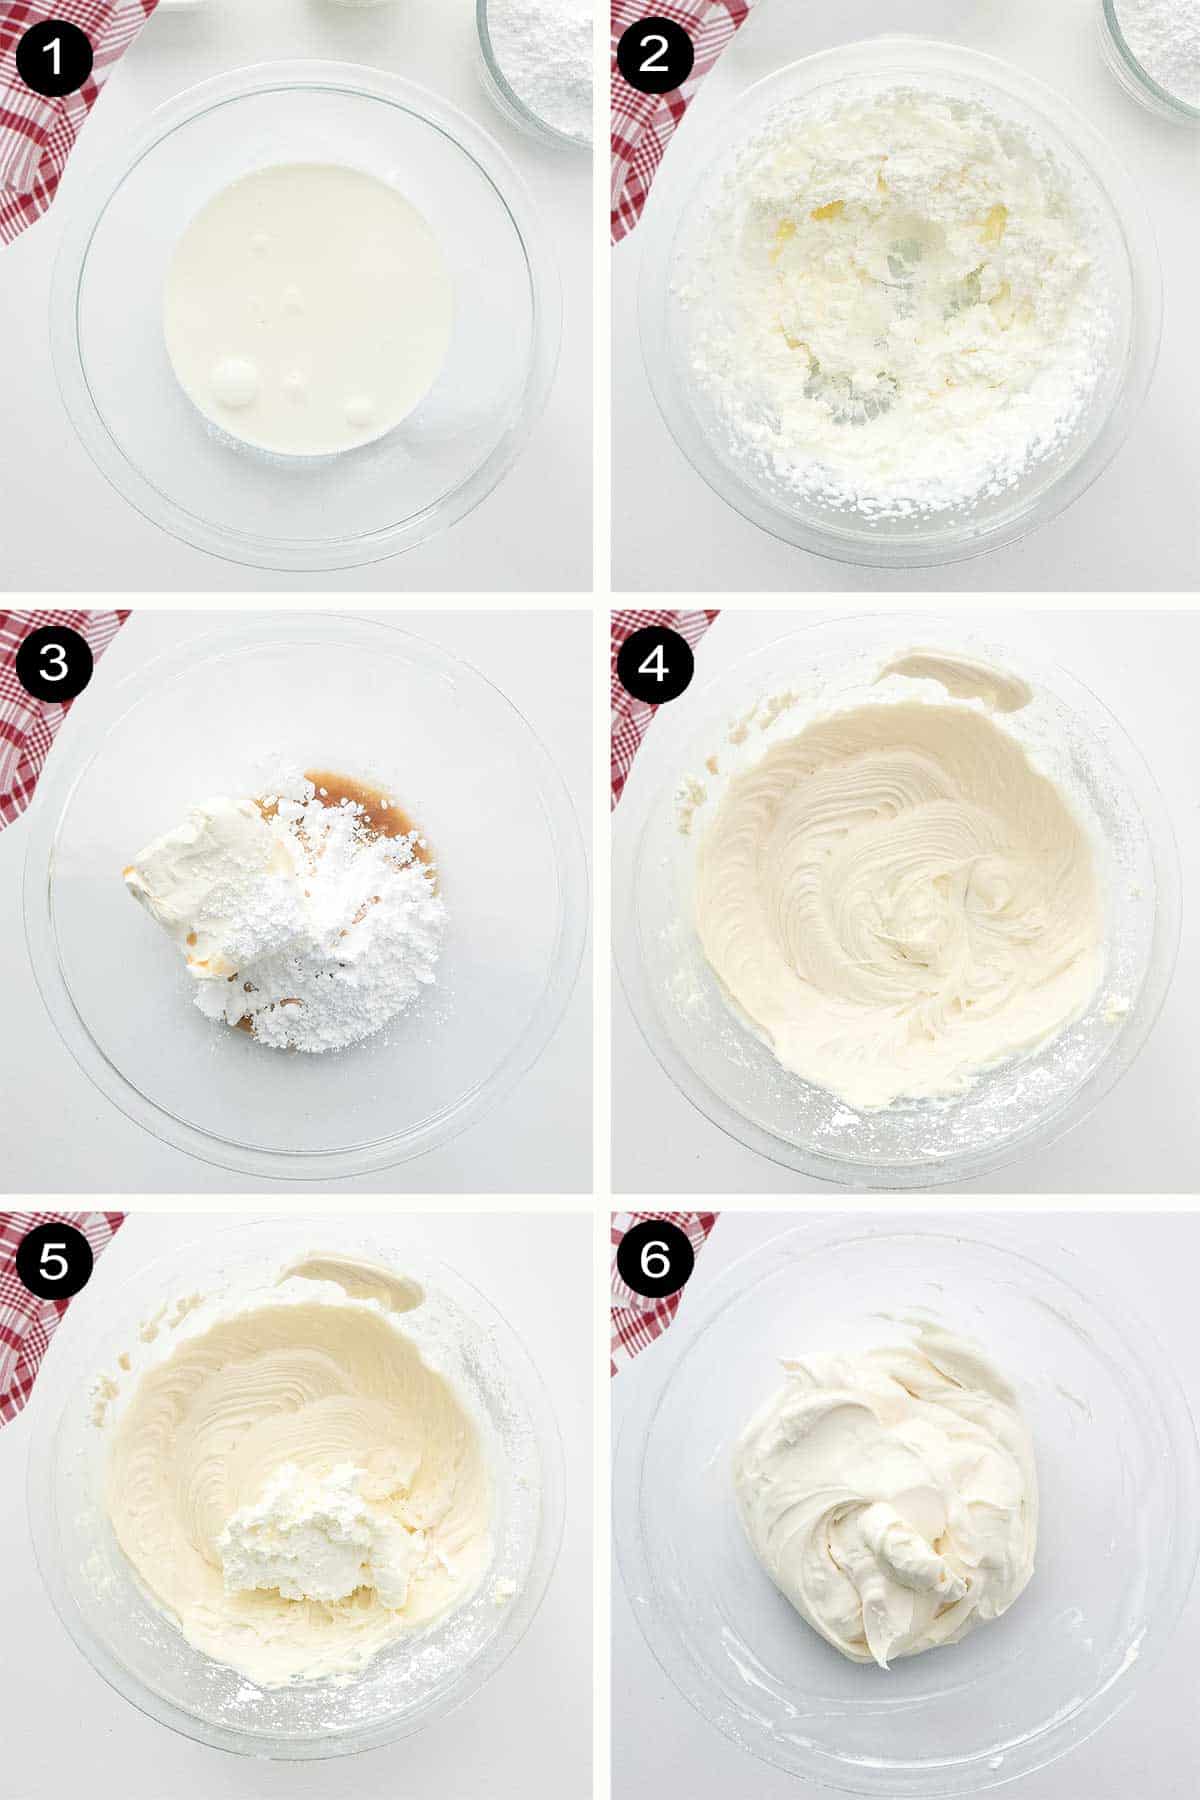
- Place the heavy cream in a mixing bowl.
- Beat at high speed until it forms stiff peaks.
- In a separate bow, combine cream cheese, powdered sugar, and vanilla extract.
- Beat until fluffy.
- Fold in half of the whipped cream into the cream cheese mixture until smooth then add the remaining whipped cream.
- Blend thoroughly then cover the bowl with plastic wrap and refrigerate for 1 hour.
How to Make Chocolate Dipped Cones

- In a microwave-safe bowl, melt the white chocolate chips in 30-second intervals on high, stirring in between, until completely melted and smooth. Dip each ice cream cone into the white chocolate to about 1 ½ inches deep. Let the excess drip off.
- Roll the outside of the cone in the sprinkles that have been spread on a flat plate.
- Repeat with the remaining cones, setting them on waxed paper, and allowing them to harden.
Assembling the Cones
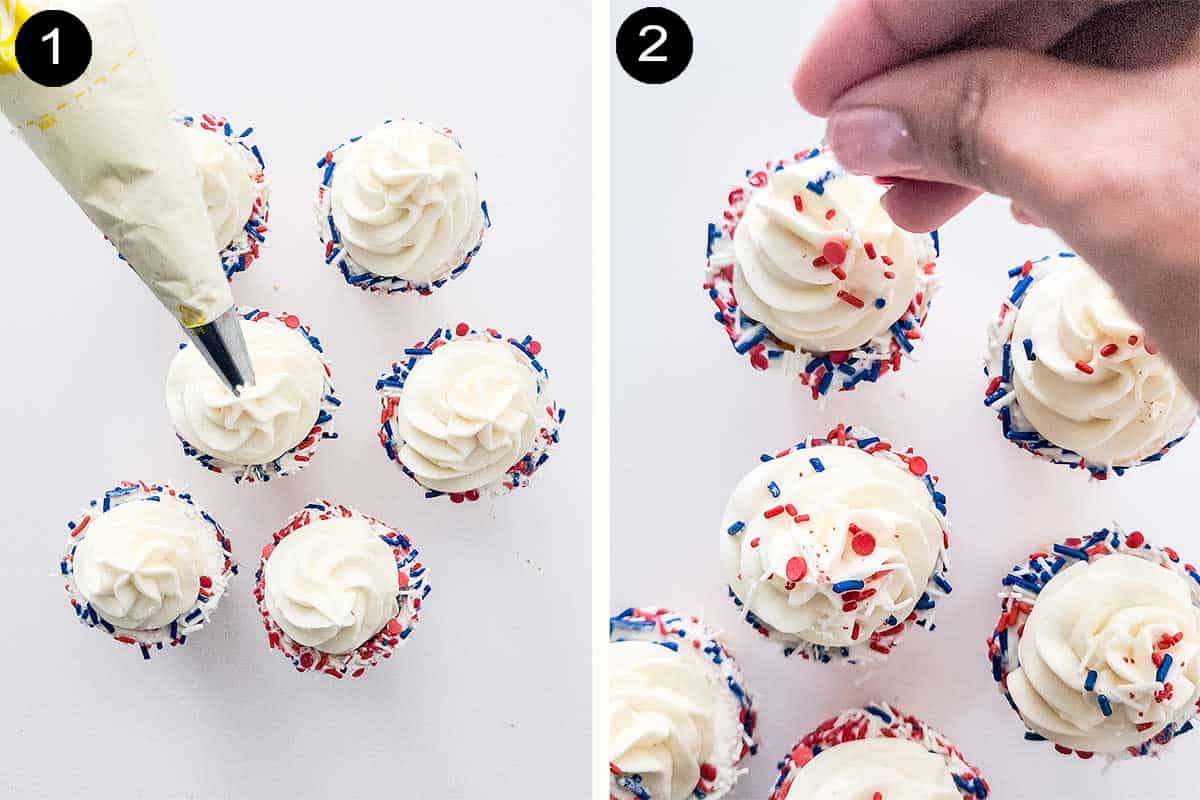
- When you are ready to assemble, remove the cheesecake mousse from the refrigerator and fill a piping bag that is fitted with a star tip. You can also use a resealable plastic bag with a corner snipped off. Fill the ice cream cones with the cheesecake mousse in swirls. You want it to resemble a soft-serve ice cream cone.
- Sprinkle the top of the cheesecake stuffed cones with extra sprinkles.

Eat right out of the cones or dig in with a spoon. It's all good!
Recipe Variations
You can make these tasty cones with a fruity touch, different colors for celebrating other holidays, or chocolate:
- Strawberry Crunch Cheesecake Cones - Combine 1 cup of finely crushed white Oreos with 1 cup of freeze-dried strawberry powder (process freeze-dried strawberries in a processor until ground into a powder). Use this mixture instead of sprinkles. You can also make extra and stir the crunch mixture into the mousse.
- Christmas Cheesecake Cones - Use red and green sprinkles.
- St. Patrick's Day Mousse Cones - Make Irish coffee mousse and dip the cones in green sprinkles.
- Easter Cheesecake Cones - Use pastel sprinkles.
- Halloween Cheesecake Cones - Use orange, green, and purple sprinkles.
- Valentine's Day Cheesecake Cones - Use red sprinkles.
- Chocolate Mousse Cones - Make chocolate mousse and dip the cones in regular chocolate instead of white chocolate.
How to Store and Freeze
It is best to store the mousse and cones separately.
Storing Mousse: Place it in an airtight container and store it in the refrigerator for up to 3 days.
Freezing Mousse: Place it in a freezer-safe container and freeze it for up to 3 months. Thaw it in the fridge overnight.
Storing Chocolate Dipped Cones: Place them in an airtight container and store them in a cool, dark place for up to 2 weeks.
More Cheesecake Recipes
- Carrot Cake Cheesecake
- Lemon Blueberry Cheesecake
- Marble Cheesecake
- Peach Cheesecake
- Fudge Truffle Cheesecake
Find lots of easy dessert recipes right here on 2CM!
LOVE QUICK & EASY RECIPES? FOLLOW ME ON INSTAGRAM, FACEBOOK, & PINTEREST FOR ALL THE LATEST RECIPE INSPIRATION! PLUS JOIN MY EMAIL LIST AND RECEIVE A FREE E-BOOK.

Equipment
Ingredients
Mousse
- ⅔ cup heavy whipping cream
- 8 ounces cream cheese
- ⅔ cup powdered sugar
- 1 teaspoon vanilla extract
White Chocolate Dipped Ice Cream Cones
- 6-10 Ice cream cones waffle or sugar
- ½ cup white chocolate melting chips
- Garnish: seasonal sprinkles
Instructions
- Place the heavy cream in a mixing bowl and whip at high speed until it forms stiff peaks.
- Place the cream cheese, powdered sugar, and vanilla extract in another bowl and whip until fluffy.
- Start with folding half of the whipped cream into the cream cheese mixture until smooth then finish with the other half and blend thoroughly.
- Cover the bowl with plastic wrap and refrigerate for 1 hour.
- While cheesecake filling is chilling, prepare your white chocolate-dipped ice cream cones.
- In a microwave-safe bowl, melt the white chocolate chips in 30-second intervals on high, stirring in between, until completely melted and smooth.
- Dip each ice cream cone into the white chocolate to about 1 ½ inches deep. Let the excess drip off then roll the outside of the cone in the sprinkles.
- Repeat with the remaining cones then set on the counter to harden.
- When you are ready to assemble, remove the mousse from the refrigerator and place into a piping bag that is fitted with a star tip. You can also use a ziplock plastic bag with a corner snipped off. It won't be as fancy looking but it works just fine.
- Fill the ice cream cones with the cheesecake mousse in swirls so that it resembles a soft-serve ice cream cone.
- Sprinkle the mousse with extra sprinkles if desired.
Leave a Reply